总想学点什么,又不知道学点什么的好,刚好一直也在美化博客,就学点前端的知识,总比不学的好。希望能把自己的学习经验和学习经历记录整理,也便于以后用的时候复习该方面的知识。
VUE是国人尤雨溪开发的一款前端框架,初步了解之后,确实很神奇,但由于仅仅只是学习,缺乏项目经验,因此本篇文章只记录Vue的相关语法。
我自己也是参考B站视频教程学习:黑马程序员vue前端基础教程-4个小时带你快速入门vue
[toc]
在使用之前,有必要去vue官网查看相关的简介和快速开始,以便于对vue整体有一个初步的了解。
要是用vue,首先得引入相关js,即:
1
| <script src="https://cdn.jsdelivr.net/npm/vue@2.6.14/dist/vue.js"></script>
|
其次,学习Vue可能需要不断地去创建html文件,因此,最好整一个模板文件,每次都复制模板文件即可,这里po一个通用的vue-html文件模板:
Vue文件模板
1
2
3
4
5
6
7
8
9
10
11
12
13
14
15
16
17
18
19
20
21
22
23
24
25
26
27
28
29
| <!DOCTYPE html>
<html>
<head>
<style>
</style>
<meta charset="utf-8">
<title>Vue_01_Demo</title>
<script src="https://cdn.jsdelivr.net/npm/vue@2.6.14/dist/vue.js"></script>
</head>
<body>
<div id="app">
{{ message }}
</div>
<script>
var app = new Vue({
el: '#app',
data: {
message: 'Hello World!'
}
});
</script>
</body>
</html>
|
el挂载点
也是实现标签和js绑定的一个最基础的实现,大致语法如下:
1
2
3
4
5
6
| var app = new Vue({
el: '#app',
data: {
message: 'Hello World!'
}
});
|
这里的#app就是所说的挂载点,如上代码便是实现id为app的标签的挂载。有了上述js代码,还得添加专门的标签才能生效和使用,语法如下:
1
2
3
| <div id="app">
{{ message }}
</div>
|
以上标签就基本实现了一个初步的vue程序。
完整代码
1
2
3
4
5
6
7
8
9
10
11
12
13
14
15
16
17
18
19
20
21
22
23
24
25
26
27
28
29
| <!DOCTYPE html>
<html>
<head>
<style>
</style>
<meta charset="utf-8">
<title>Vue_01_Demo</title>
<script src="https://cdn.jsdelivr.net/npm/vue@2.6.14/dist/vue.js"></script>
</head>
<body>
<div id="app">
{{ message }}
</div>
<script>
var app = new Vue({
            el: '#app',
            data: {
                message: 'Hello World!'
            }
        });
</script>
</body>
</html>
|
结果相关函数的一些高级用法
1
2
3
4
5
6
7
8
9
10
11
12
13
14
15
16
17
18
19
20
21
22
23
24
25
26
27
28
29
30
| <!DOCTYPE html>
<html>
<head>
<meta charset="utf-8">
<title>Auraro</title>
<script src="https://static.runoob.com/assets/vue/1.0.11/vue.min.js"></script>
</head>
<body>
<p>修改输入框的值,查看效果:</p>
<div id="app">
<p>{{* message}}</p>
<p>{{ message }}</p>
<p>{{ message + '官网地址:www.mingsrc.work' }}</p>
<p>{{ message.split('').reverse().join('') }}</p>
<input v-model="message">
</div>
<script>
var app = new Vue({
el: '#app',
data:{
message: "学习Vue",
}
})
</script>
</body>
</html>
|
上述代码就是Vue的最基础的入门实例了,关于Vue的其他用法则需要一步一步了解。
其实不难发现,new出来的Vue的内容就是json格式的串。
本地应用
什么是本地应用?通俗理解就是js基于dom来获取并操作页面元素的方法,在Vue中使用以v-开头的特殊语法来实现,如v-text、v-html、v-on、v-show、v-if、v-on等一系列vue指令。
v-text
就是把内容直接输出为内容,不进行渲染,以下为例:
1
2
3
4
5
6
7
8
9
10
11
| <div id="app">
<p v-text="content"></p>
</div>
<script>
var app = new Vue({
el: '#app',
data: {
content: '<a href="https://www.mingsrc.work">Auraro</a>',
}
});
</script>
|
其输出就是 :<a href="https://www.mingsrc.work">Auraro</a>
v-html
会把Json对象指向的内容渲染为HTML元素,同上代码,如果v-text替换为v-html,其输出就会变为:
Auraro
v-on
即交互事件,当发生点击事件时的处理,v-on有多种写法,可以使用v-on,也可以使用简写的方式:
1
2
3
| <input type="button" value="v-on指令" v-on:click="doIt">
<input type="button" value="v-on简写" @click="doIt">
<input type="button" value="双击事件" @dblclick="doIt">
|
直接pao一个代码:
v-on
1
2
3
4
5
6
7
8
9
10
11
12
13
14
15
16
17
18
19
20
21
22
23
24
25
26
27
28
29
30
31
32
33
34
35
36
37
38
| <!DOCTYPE html>
<html>
<head>
<meta charset="utf-8">
<title>vue_04_交互</title>
<script src="https://static.runoob.com/assets/vue/1.0.11/vue.min.js"></script>
</head>
<body>
<div id="app">
<input type="button" value="v-on指令" v-on:click="doIt">
<input type="button" value="v-on简写" @click="doIt">
<input type="button" value="双击事件" @dblclick="doIt">
<h2 @dblclick="changeFood">{{ food }}</h2>
</div>
<script>
var app = new Vue({
el: '#app',
data: {
food: "西蓝花炒蛋",
todos: [
{ text: '菜鸟教程' },
{ text: 'www.runoob.com' },
{ text: 'www.w3cschool.cc' }
]
},
methods: {
doIt:function(){
alert("this is 'Hello World' Button");
},
changeFood:function(){
console.log(this.food);
this.food+="好好吃!";
}
}
})
</script>
</body>
</html>
|
使用v-on实现一个简单的计数器
1
2
3
4
5
6
7
8
9
10
11
12
13
14
15
16
17
18
19
20
21
22
23
24
25
26
27
28
29
30
31
32
33
34
35
36
37
38
39
40
41
42
43
44
45
46
47
48
49
50
51
52
53
54
55
| <!DOCTYPE html>
<html>
<style>
#app{
text-align: center;
vertical-align: middle;
padding: 300px;
font-size: 100px;
}
button{
font-size: 100px;
width: 200px;
}
</style>
<head>
<meta charset="utf-8">
<title>Vue_05_+-</title>
<script src="https://static.runoob.com/assets/vue/1.0.11/vue.min.js"></script>
</head>
<body>
<div id="app" class="input-num">
<button @click="sub">-</button>
<span>{{ num }}</span>
<button @click="add">+</button>
</div>
<script>
new Vue({
el: '#app',
data: {
message: 'Hello World!',
num: 1
},
methods: {
add: function () {
console.log("add");
if (this.num < 10) {
this.num++;
} else {
alert("已经是最大值了");
}
},
sub: function () {
console.log("sub");
if (this.num > 0) {
this.num--;
} else {
alert("已经是最小值了");
}
}
}
});
</script>
</body>
</html>
|
v-show
v-show为标签的显示开关,可以通过设置v-show的值选择组件是否展示。
#注意:v-show相当于通过设置标签的visibility为hidden,在源码中还是能看到该元素标签,对内存消耗较小。
v-show用法示例
1
2
3
4
5
6
7
8
9
10
11
12
13
14
15
16
17
18
19
20
21
22
23
24
25
26
| <div id="app">
<button @click="changeIsShow">图片显示开关</button>
<button @click="addArg">累加Arg {{ isShowArg }}</button>
<br>
<img src="../img/1.jpg" v-show="isShow" alt="v-show test">
<img src="../img/2.jpg" v-show="isShowArg>=10" alt="v-show test">
</div>
<script>
new Vue({
el: '#app',
data: {
message: 'Hello World!',
isShow: false,
isShowArg: 1
},
methods: {
changeIsShow:function(){
this.isShow = !this.isShow;
},
addArg:function(){
this.isShowArg++;
}
}
});
</script>
|
v-if
与v-show功能类似的还有v-if,但不同的是,v-if会直接隐藏掉源码,即通过修改HTML源码删除相应的标签修改页面展示
v-if用法示例
1
2
3
4
5
6
7
8
9
10
11
12
13
14
15
16
17
18
19
| <div id="app">
<input type="button" value="切换文字显示状态" @click="toggleIsShow">
<p v-if="isShow" > {{ message }} 测试文字</p>
</div>
<script>
var app = new Vue({
el: '#app',
data: {
message: 'Hello World!',
isShow: true
},
methods:{
toggleIsShow:function(){
this.isShow = !this.isShow;
}
}
});
</script>
|
v-bind
v-bind就是绑定的意思,可以绑定标签的一些属性,写法为v-bind:src=“imgSrc”,即绑定标签的src属性,设置其值为Json对象imgSrc的值。
v-bind用法示例
1
2
3
4
5
6
7
8
9
10
11
12
13
14
15
16
17
18
19
20
21
22
23
| <div id="app">
<input value="切换" type="button" @click="toggleActive">
<img :src="imgSrc" :class="isActive?'active':''"/>
<img :src="imgSrc" :class="{active:isActive}"/>
</div>
<script>
var app = new Vue({
el: '#app',
data: {
message: 'Hello World!',
imgSrc: "../img/4.jpg",
imgTitle: "",
isActive: false
},
methods:{
toggleActive:function(){
this.isActive = !this.isActive;
}
}
});
</script>
|
v-for
即Vue的遍历插件,会对Json数组对象的每个成员访问。下边使用v-for打印李商隐的《荷花》。
[荷花 ](https://so.gushiwen.cn/shiwenv_2c99bc7b0323.aspx)
[李商隐](https://so.gushiwen.cn/authorv.aspx?name=李商隐)[〔唐代〕](https://so.gushiwen.cn/shiwens/default.aspx?cstr=唐代)
都无色可并,不奈此香何。
瑶席乘凉设,金羁落晚过。
回衾灯照绮,渡袜水沾罗。
预想前秋别,离居梦棹歌。
v-for代码示例
1
2
3
4
5
6
7
8
9
10
11
12
13
14
15
16
17
18
19
20
21
| <div id="app">
<p v-for="(item,index) in msgArr" :title="index">{{ item }}</p>
</div>
<script>
var app = new Vue({
el: '#app',
data: {
message: 'Hello World!',
msgArr: [
"荷花",
"李商隐〔唐代〕",
"都无色可并,不奈此香何。",
"瑶席乘凉设,金羁落晚过。",
"回衾灯照绮,渡袜水沾罗。",
"预想前秋别,离居梦棹歌。"
]
}
});
</script>
|
浏览器就会输出这首《荷花》。
需要注意的几个用法:
当然,也支持Json数组的解析。
1
2
3
4
5
6
7
8
9
10
11
12
13
14
15
16
17
18
| msg_2:{
title:"荷花",
author:"李商隐〔唐代〕",
content:[
{
sentence: "都无色可并,不奈此香何。",
},
{
sentence: "瑶席乘凉设,金羁落晚过。",
},
{
sentence: "回衾灯照绮,渡袜水沾罗。",
},
{
sentence: "预想前秋别,离居梦棹歌。",
}
]
}
|
使用上述Json数据时,则需要更改v-for的格式才能有效遍历:
1
| <p v-for="it_2 in msg_2.content" :title="it_2">{{ it_2.secntence }}</p>
|
使用了v-model绑定了input,每点击一次按钮,界面就会增加输入框中的内容。
1
2
3
4
5
6
7
8
9
10
11
12
13
14
15
16
17
18
19
20
21
22
23
24
25
26
27
28
29
30
31
32
33
34
35
36
37
38
39
40
41
| <!DOCTYPE html>
<html>
<head>
<style>
</style>
<meta charset="utf-8">
<title>Vue_01_Demo</title>
<script src="https://cdn.jsdelivr.net/npm/vue@2.6.14/dist/vue.js"></script>
</head>
<body>
<div id="app">
<input type="button" value="打印输入内容" @click="print('hello')">
<input type="text" v-model="inputValue" @keyup.enter="msgBox">
<p v-for="it in showValue">{{ it.name }}</p>
</div>
<script>
var app = new Vue({
el: '#app',
data: {
message: 'Hello World!',
inputValue:'',
showValue:[]
},
methods:{
print:function(str){
this.showValue.push({name:this.inputValue})
},
msgBox:function(){
alert("ok");
}
}
});
</script>
</body>
</html>
|
简而言之就是实现标签的绑定,应用于关联标签之间的数据绑定。在v-on补充中有相应的用法可以参考使用。
1
2
3
| {% hideToggle 分割线 %}
{% endhideToggle %}
|
综合上述所学,实现首页图片切换的功能
代码
1
2
3
4
5
6
7
8
9
10
11
12
13
14
15
16
17
18
19
20
21
22
23
24
25
26
27
28
29
30
31
32
33
34
35
36
37
38
39
40
41
42
43
44
45
46
47
48
49
50
51
52
53
54
55
56
57
58
59
60
61
62
63
64
65
66
67
68
69
70
71
72
73
74
75
76
77
78
79
80
81
82
| <!DOCTYPE html>
<html>
<head>
<style>
a{
text-decoration: none;
font-size: 40px;
background-color: rgba(255, 255, 255, 0.5);
padding: 10px;
border-radius: 25px;
position: relative;
z-index: 99;
width: 100%;
color: black;
top: 510px;
}
a:active {
color: white;
}
body{
align-items: center;
text-align: center;
}
.imgShift{
zoom: 100%;
border: 1px solid white;
width: 1960px;
height: 1060px;
}
</style>
<meta charset="utf-8">
<title>Vue_09_ShiftImg</title>
</head>
<body>
<div id="mask">
<a href="javascript:void(0)" @click="prev" style="right:45%">←</a>
<a href="javascript:void(0)" @click="next" style="left:45%">→</a>
<br>
<img :src="imgArr[index]" alt="" :class="'imgShift'" />
</div>
<script src="https://cdn.jsdelivr.net/npm/vue@2.6.14/dist/vue.js"></script>
<script>
var app = new Vue({
el: '#mask',
data: {
imgArr: [
"../img/2.jpg",
"../img/3.jpg",
"../img/4.jpg",
"../img/1.jpg"
],
message: 'Hello World!',
index: 0
},
methods: {
prev: function () {
this.index--;
if(this.index < 0)
{
this.index = 3;
}
},
next: function () {
this.index++;
if(this.index > 3)
{
this.index = 0;
}
}
}
});
</script>
<script src="https://cdn.jsdelivr.net/npm/vue@2.6.14/dist/vue.js"></script>
</body>
</html>
|
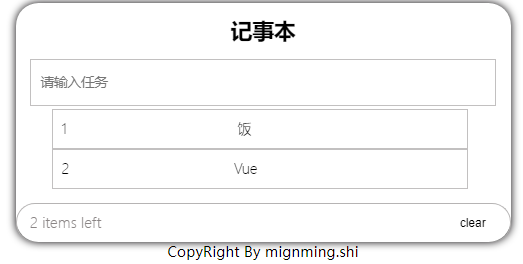
小黑记事本的实现
结合以上所学,实现一个记事本功能,CSS样式修饰比较麻烦,仅就功能敲一下代码
Temp_Code
代码
1
2
3
4
5
6
7
8
9
10
11
12
13
14
15
16
17
18
19
20
21
22
23
24
25
26
27
28
29
30
31
32
33
34
35
36
37
38
39
40
41
42
43
44
45
46
47
48
49
50
51
52
53
54
55
56
57
58
59
60
61
62
63
64
65
66
67
68
69
70
71
72
73
74
75
76
77
78
79
80
81
82
83
84
85
86
87
88
89
90
91
92
93
94
95
96
97
98
99
100
101
102
103
104
105
106
107
108
109
110
111
112
113
114
115
116
117
118
119
120
121
122
123
124
125
126
127
128
129
130
131
132
133
134
135
136
137
138
139
140
141
142
143
144
145
146
147
148
149
150
151
152
153
154
155
156
157
158
159
160
161
162
163
164
165
166
| <!DOCTYPE html>
<html>
<head>
<style>
</style>
<meta charset="utf-8">
<title>Vue_01_Demo</title>
<script src="https://cdn.jsdelivr.net/npm/vue@2.6.14/dist/vue.js"></script>
</head>
<style>
#todoapp{
display:grid;
border: none;
width: 100%;
height: 100%;
align-self: center;
text-align: center;
max-width: 550px;
min-width: 230px;
line-height: 1.4em;
margin: 0 auto;
font-weight: 300;
filter:drop-shadow(1px 1px 5px rgb(2, 1, 2));
border-radius: 25px;
transform: scale3d(1,1,1);
transition: cubic-bezier(0.215, 0.610, 0.355, 1);
background-color: white;
}
#footer {
color: rgb(138, 133, 133);
border: 1px rgb(182, 180, 180) solid;
display:inline-block;
padding: 10px 15px;
border-bottom: none;
border-radius: inherit;
}
#main{
height: 30%;
width: 80%;
}
#todo-list {
width: 100%;
}
#todo{
list-style-type: none;
font: '微软雅黑';
font-size: 15px;
padding: 10px;
border: 1px rgb(194, 192, 192) solid;
text-align: center;
width: 100%;
}
.new-todo{
width: 90%;
font-size: 15px;
padding: 10px;
border: 1px rgb(194, 192, 192) solid;
height: 30%;
display:flexbox;
filter: opacity(1);
background-color: transparent!important;
}
#view {
}
#index{
text-align: left;
float: left;
}
#destroy {
float: right;
height: 10%;
width: 9%;
filter: opacity(0);
border: none;
background-color: none;
}
li:hover #destroy {
filter: opacity(1);
background-color: none;
color: black;
font-size: 15px;
}
li:hover {
color: white;
background-color: rgb(46, 115, 243);
}
#info {
bottom: -850px;
text-align: center!important;
}
button {
background-color: transparent;
width: 10%;
height: 100%;
border: none;
}
button:hover {
background-color: rgb(46, 115, 243);
color: white;
border-radius: 25px;
filter: drop-shadow(1px 2px 5px rgb(229, 221, 230));
transform: scale(1.5,1.5);
font-size: 15px;
font-family: 'Franklin Gothic Medium', 'Arial Narrow', Arial, sans-serif;
}
</style>
<body>
<section id="todoapp">
<header class="header">
<h1> 记事本 </h1>
<input v-model="inputValue" type="text" @keyup.enter="add" placeholder="请输入任务" class="new-todo" />
</header>
<section id="main">
<ul id="todo-list">
<li id="todo" v-for="(item,index) in list">
<div id="view">
<span id="index">{{ index+1}}</span>
<label style="text-align: left;">{{ item }}</label>
<button id="destroy" @click="remove(index)">×</button>
</div>
</li>
</ul>
</section>
<footer id="footer">
<label style="float: left;">{{ list.length }} items left</label>
<button style="float: right;" @click="clear">clear</button>
</footer>
</section>
<footer id="info">CopyRight By mignming.shi</footer>
<script>
var app = new Vue({
el: '#todoapp',
data: {
list:["牺牲你宝贵的时间去干了更宝贵的事情吗?","保持思考"],
inputValue:""
},
methods:{
add:function(){
if(this.inputValue.length != 0){
this.list.push(this.inputValue);
this.inputValue = "";
}
},
remove:function(x){
console.log(x);
this.list.splice(x,1);
},
clear:function(){
this.list = [];
}
}
});
</script>
</body>
</html>
|
效果